
If you like the appeal of the paint illustration that was made pastels or pencils, currently with Adobe Photoshop CS3 as well as CS4, you could exercise these impacts to your electronic images. Without attracting abilities, you have actually had the ability to attract illustrations. There are couple of ideas from me, if you desire an illustration pain tinged a lot more ideal, make use of the Graphic Tablet computer mouse rather. Curious? Then follow the actions!
Action 1:
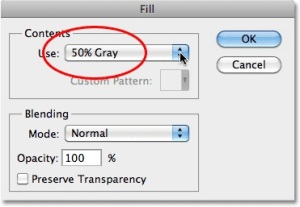 Discover an electronic image with high resolution both as a recommendation illustration, open up the picture in the Documents Food selection > Open. Produce a brand-new layer simply over it as well as call the layer “Gray Layer”. Select the shade light grey from the Shade Picker as the Foreground Shade, then click OK. Fill up the layer with the shade of the foreground shade by clicking the Edit food selection, after that choose Load > Foreground Shade and also click OK.
Action 2:
Next off, switch over to the layer scheme, pick Food selection Layers > Develop New Fill up or Change Layer, then pick Pattern. Select team ‘Papers Grayscale’ as well as choose the fibers 1 kind. And also prior to pushing the ALRIGHT switch, larger-scale pattern in the appearance of 300% in the Range column after that proceed by clicking OK.
Action 3:
Modification of the layer mixing to Soft Light with the Opacity to 40%. Following replicate the history layer/design and also name it “radiant sides” on the copied layer. This is done to provide impact to these layers.
Action 4:
 Currently, most likely to filter food selection, pick Stylize > Radiant sides. Drag the slider ‘Side Size’ to number 3, removal the slider ‘Side Illumination’ to number 12, drag the slider ‘level of smoothness’ to the number 7 and also click OK. Still on Layer ‘Beautiful sides’, invert discoloration in this layer by picking Photo food selection, pick Adjustments > Invert (Ctrl + I). Due to the fact considering that we do not require shade details at this layer, transform the shade to be black & white by choosing the Picture food selection, choose Modification Desiderate or push an essential mix (Ctrl + Change + U) on the key-board.
Action 5:
Removal of the layer “Radiant sides” is to pile the leading layer by dragging while holding the left computer mouse switch. Modification of the Layer Mixing right into multiply by establishing the Opacity to 20%. Go back to layer, replicate the layer History/design and also name this brand-new layer with the ‘Map out’. On this layer, we will certainly develop an illustration impact. Throw out shade info at this layer by picking Photo food selection, choose Change > Desiderate or press the crucial mix “Change + Ctrl + U” on the key-board.
Action 6:
Next off, remove the illustration layer to the pile leading layer by dragging while holding the left computer mouse switch. After that, raise the comparison in this layer by choosing Picture food selection, and also pick Adjustments > Contours or push the essential mix “Ctrl + F” on your key-board as well as click OK. Provide Grainy impact by picking Filter food selection, pick Sound > Include Sound. Drag the slider ‘Quantity’ to 14.21%, pick Gaussian in the Circulation column, and check Single area and also click OK.
Action 7:
Conceal the initial layer “Lay out” by selecting layer food selection, pick Layer Mask > Conceal All. You likewise could push the Include Layer Mask switch below the layer combination after that click the Edit food selection, pick Fill up > Black. This layer makes the layer continues to be noticeable on the setting, but also for currently, concealed under the mask.
Action 8:
Currently pick the Brush Device (B), after that click the Toolbar Brush to choose the brush form. Select the Dry Media Brushes and afterwards choose the sort of brush Pastel on Charcoal Paper. If you make use of the Graphic Tablet computer, open the Brush Editor by pushing the F5 key on your key-board. Dynamic Forming Panel, transform the Dimension Control Jitter from Off to Pen Stress. Likewise, in the Various other Characteristics Panel, alter the Opacity Jitter ends up being Pen Stress Control. If you utilize the Computer mouse, you should not open up the Brush Editor, just transform the amount of Opacity as well as Circulation at the Alternative bar.
 Action 9:
Back to the Map out Layer; click the thumbnail black mask to deal with the Mask. Do not fail to remember to utilize the Foreground Shade to white. Establish brush dimension 15 px, opacity to 55% as well as Circulation to 75%, damaged Stylus pen/Computer mouse gradually. Use on the initial face of the personality, such as eyes, brows, nose and also mouth. Do extra scrapes, particularly for the body shapes.
Action 10:
Currently scraped Brush hair in the structure. Make use of a smaller sized brush, regarding the dimension of 10px. Currently, bigger brush dimension of 30 px, scraped in all parts of the hair. And also additionally, bigger Opacity to 98% as well as utilize a little brush (10 px) to additional enhance the person’s eyes and also mouth. And also as a last resort Health Physical fitness Articles, brush in darkness locations using the Brush dimension 35 px or bigger and also Opacity to 81%.
Interested in finding professionally made Adobe Photoshop tutorials for beginners to help you learn how to use Photoshop? Well now you can with our Photoshop training courses. Visit our website Design Workshop Sydney and contact us today!
